Fuzzy Faux-Fur for Winter Cuddles
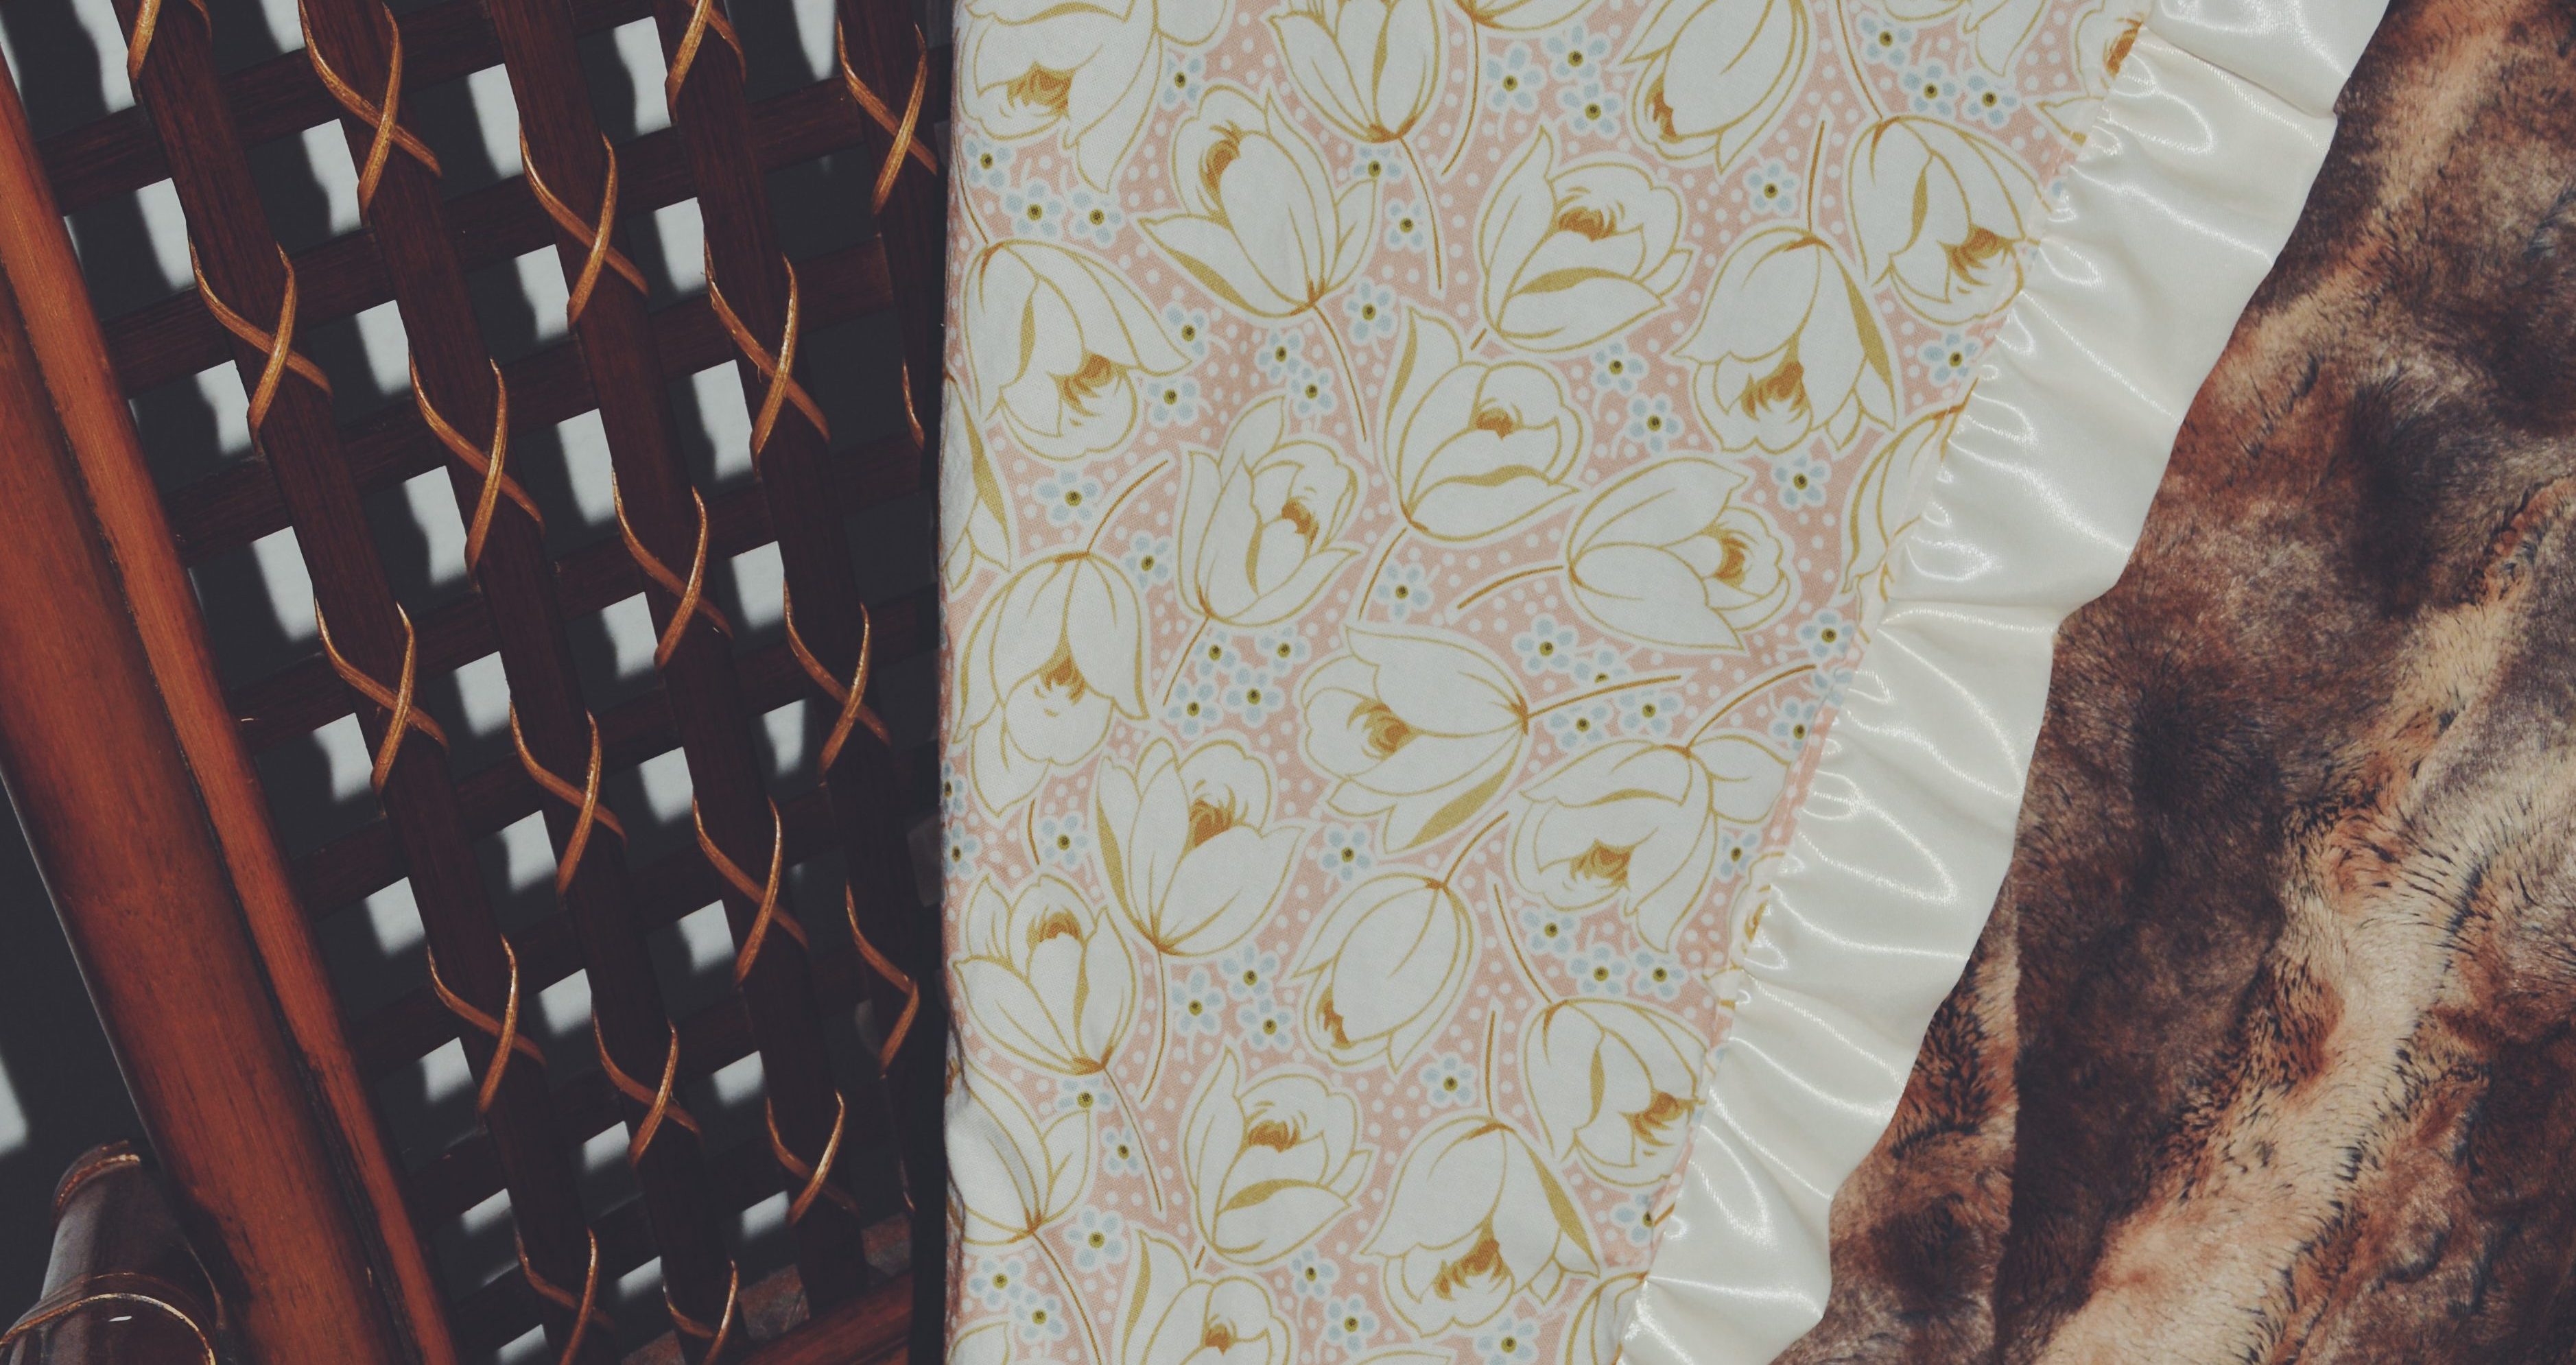
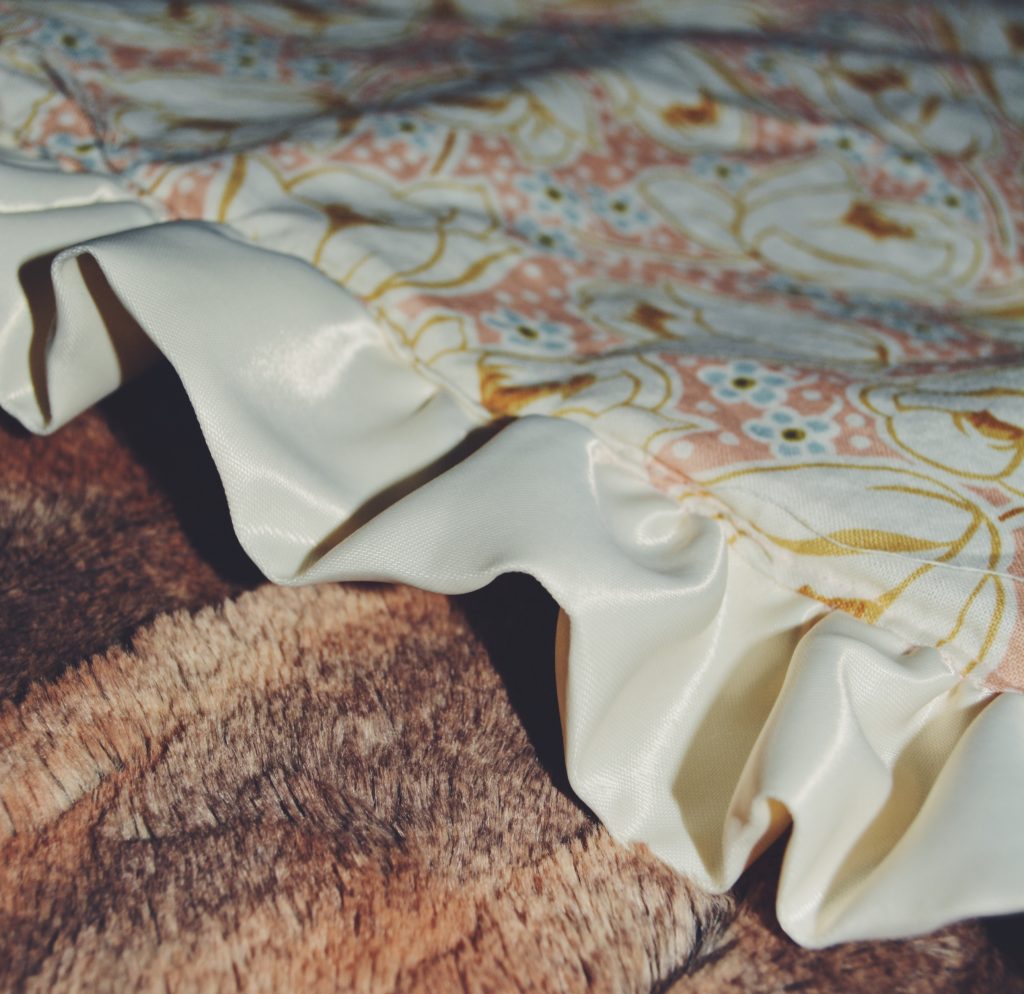
Cuddle your tiny-tot up this winter with a satin ruffle edged faux-fur blanket.
One of the hottest trends that I have been seeing in baby décor and blankets has been faux fur. I wanted something soft and cuddle worthy. There are a lot of synthetic faux furs out there, but I wanted something the texture of a minky fabric that we have seen on numerous baby blankets before. These blankets often cost a fortune at baby boutiques and they seem so simple to make.
I hope you enjoy this adorable blanket just as much as I do. It was made as a gift for a girlfriend’s new bundle of joy. The total cost of this project was around $30-45 dollars (depending on your fabric choice).
Supplies and Materials you will need:
1 ¼ yds of faux fur minky fabric
1 ¼ yds of cotton or a polycotton blended fabric
2 satin baby blanket bindings (you can make these on your own, but I cheated and didn’t have time, so I bought the pre-pressed ones)
Matching thread
Sewing Machine
Pins
Fabric Scissors or Rotary Cutter
Trim your fabric to a perfect rectangle. When you get your fabric from the store or online often there will be an uneven cut. Please even out your rectangle so your faux-fur and top cotton blend fabric match.
I wanted the blanket to have rounded corners. If you wish to have the same effect and don’t have a corner cutter quilting ruler, you can do what I did.
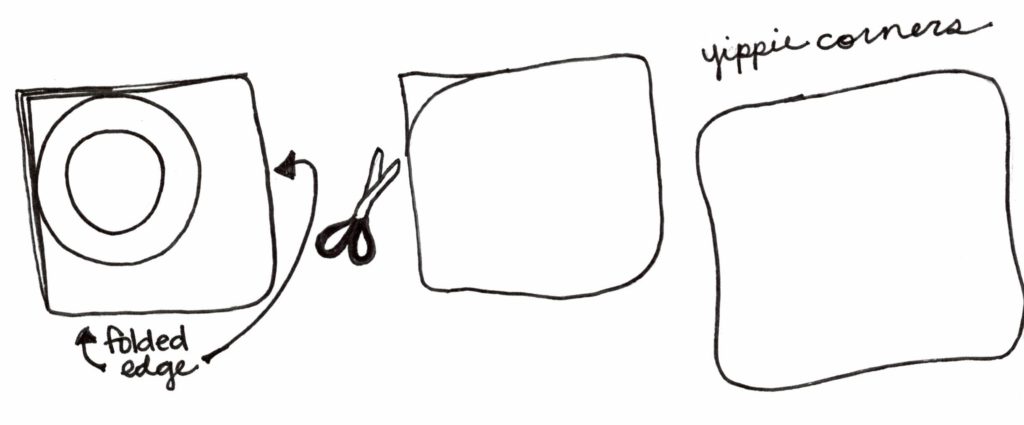
Choose a dinner or salad plate that has the desired curve or shape you wish your blanket to have. The larger the plate the more gradual the curved corner will be. Fold your two pieces of fabric in half and repeat again so you have all the corners lined up in the same area. Lay your fabric rectangle on a flat surface and place your plate on the corners you need to cut. Line them up so that the plate edge matches with the edges of the fabric on both sides. Trace a line our the outer rim of the plate with a fabric pencil or any marking tool. Cut along your desired line using fabric scissors or a rotary cutter.
Once you have your fabric cut and set set it aside and it is time to make the satin ruffle. An easy way to make your ruffle a lot quicker than cutting fabric and pressing everything is to use pre-made satin baby blanket binding. stitch your two sets of binding together to create one long strip of binding. Once you have done this you need to change the setting on your sewing machine to a large stitch length (4-5) and loosen the tension.
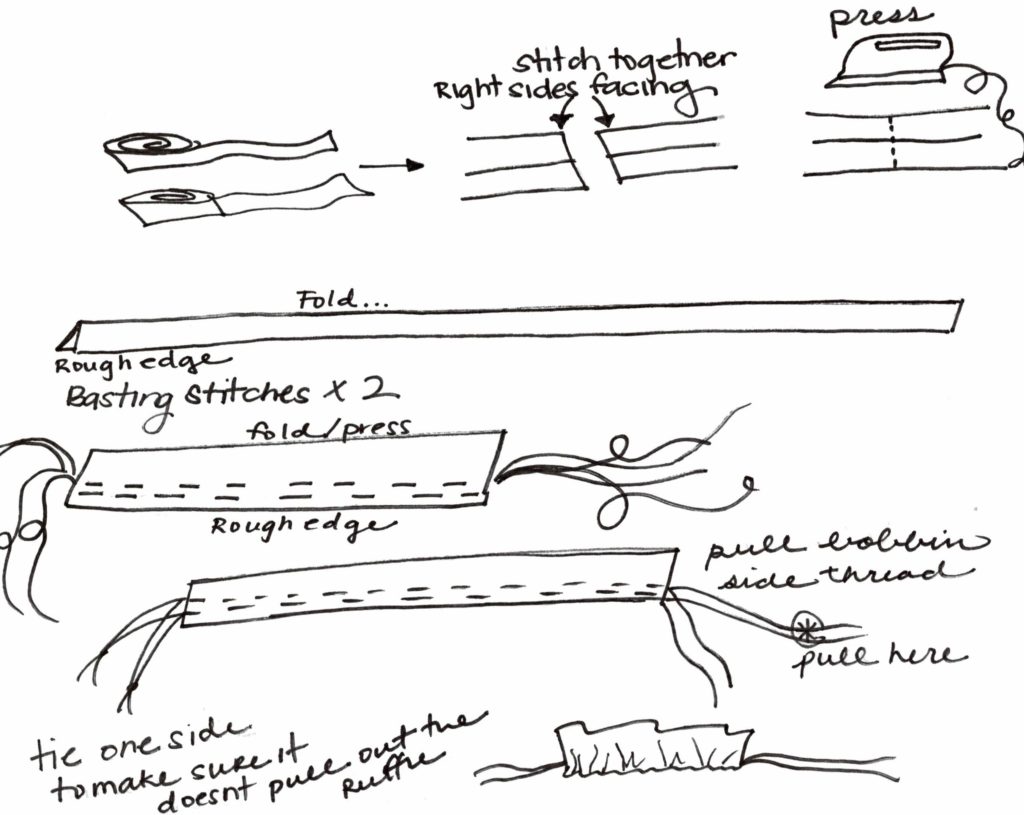
Stitch two parallel rows of basting stitches at the open/unfinished edge of the blanket binding about 1/4 inch away from the edge. Make sure you leave long pieces of thread at the start and ending of each basting stitch. Once you have your double row of basting stitches in place. You are going to take one end of your binding and take the bobbin side of the thread and pull to create a ruffle. Make sure you are pulling the two bobbin end threads at the same time to crease even ruffles. Work your way through your entire satin binding and even out the ruffles.
Once your ruffle is made you can stitch down your ruffle after changing your sewing machine settings back to normal.
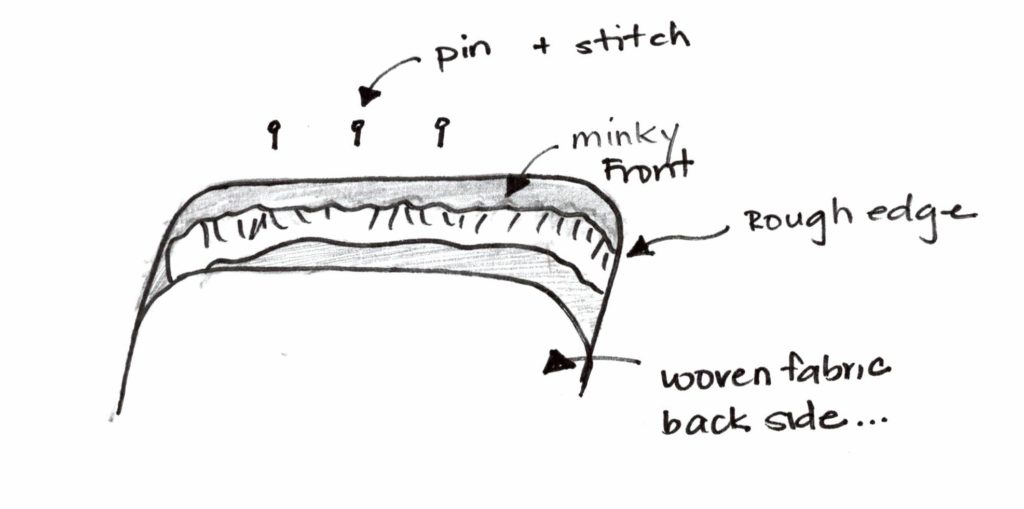
You are now going to sandwich your ruffle between your two pieces of fabric. Make sure the two pieces of fabric are facing each other right side up and that your raw ruffle edge is lined up so you can see the raw edges in the middle of your sandwich. Once your have your ruffle fabric sandwich pinned, you will stitch around most of the blanket, but leave an opening about 1 foot long so you are able to invert your blanket.
Once your have turned your blanket right side up you need to pin your opening together and top stitch around your baby blanket to make sure the edge doesn’t pucker or warp with washing by rolling the edge in your fingers till it is smooth before sending it through the sewing machine one final time.
Cut your threads and your baby blanket will be ready to go.